Secondary Category
- Please go through Categorization to understand how the categorization under ecommerce works
- Please go through Master Category to understand where the secondary category will be mapped to
This document helps you to understand the steps to add Secondary category in the Strackit Business for your ecommerce website. In this page, you will understand the following details
- How to add new secondary category
- How to add / update image for the secondary category
- How to edit the secondary category
- How to change the position of the secondary category
- How to deactivate the secondary category
How to add new master category
Navigate to Menu -> Ecommerce -> Secondary Category
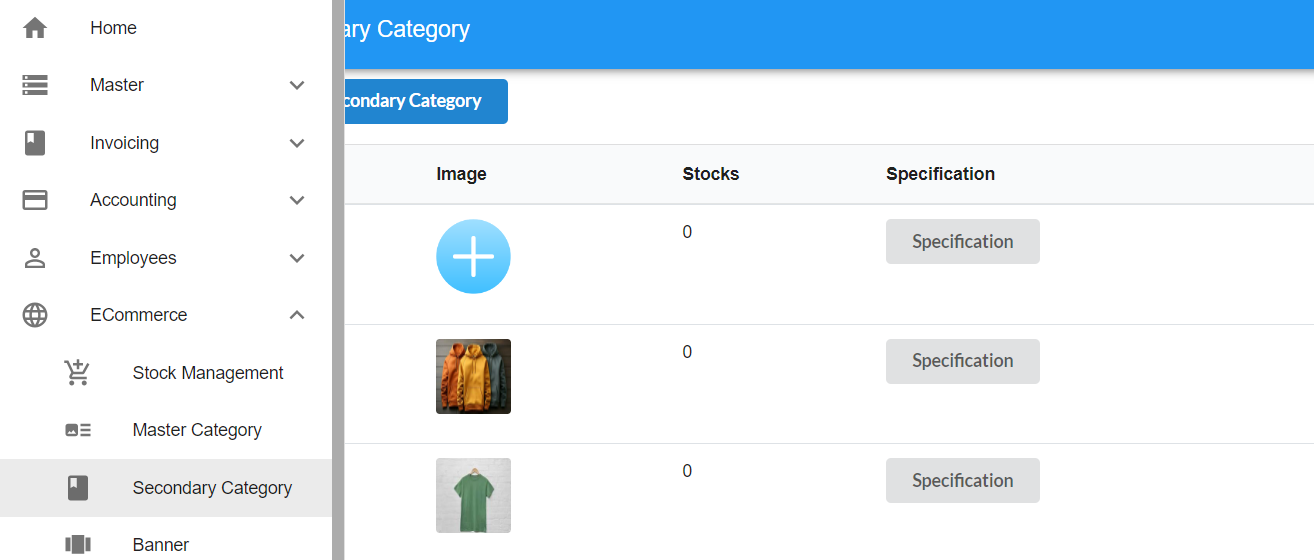
Refer to the image above to view and manage secondary categories. If any secondary categories have already been added, they will be listed on the page after choosing the corresponding master category. You can select a master category from the dropdown and add its related secondary category accordingly.

Refer to the above image to navigate to the secondary category. Use the dropdown to select an already added master category.
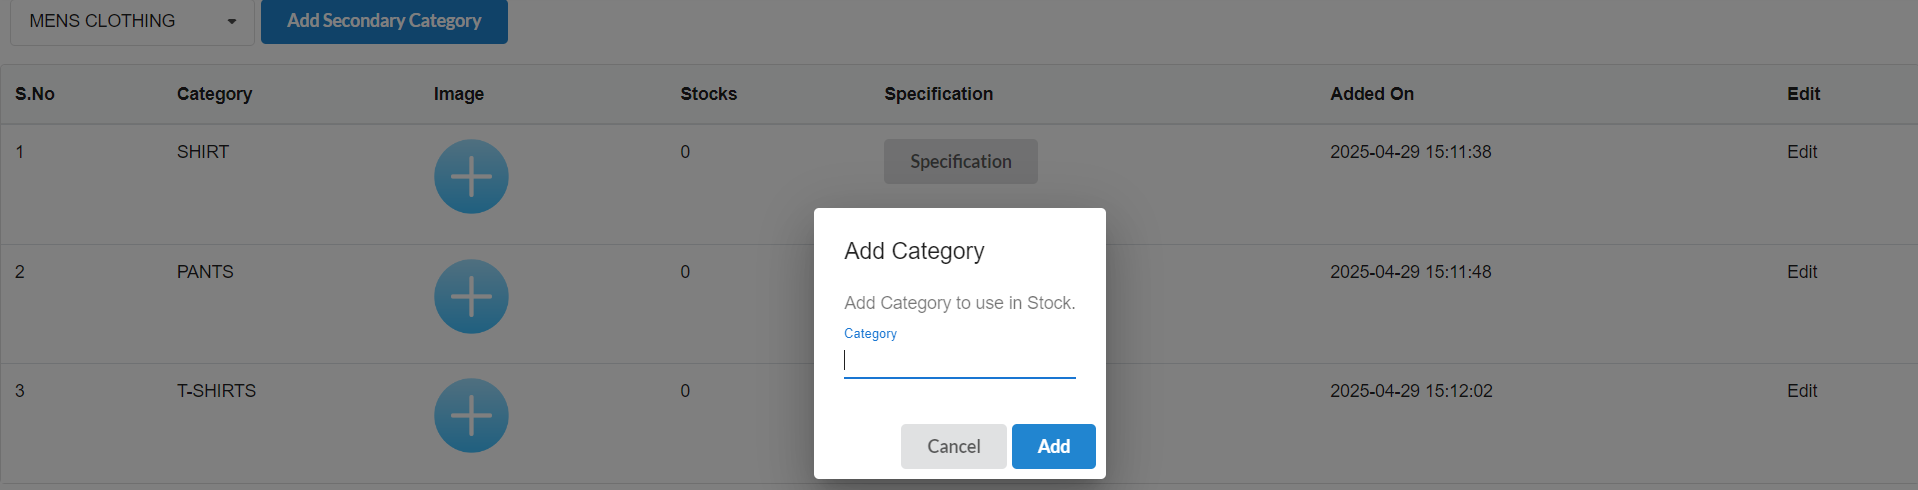
You can see a popup like this, to add a secondary category. First, select a master category from the dropdown. Then, click the “Add Secondary Category” button at the top left. Enter the name of the secondary category in the input box and click on the Add button. The new secondary category will be added under the selected master category for your ecommerce website.
How to add / update image for the secondary category
In the secondary category page, under the image column, if the image is already uploaded, the uploaded image will be displayed. On the other hand, if there is no image updated, you can see the ‘+’ button to update the new image.
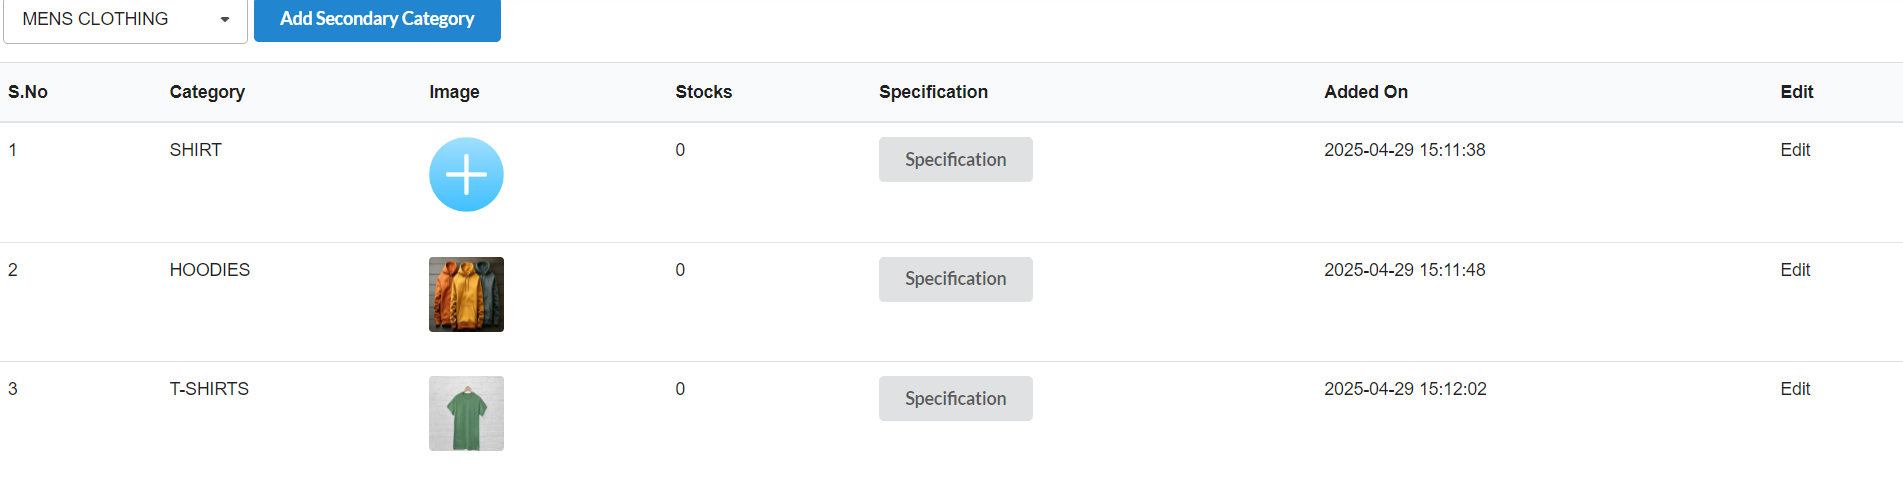
With the help of the image column, you can either upload a new image or the image will be replaced if you upload it again.
How to edit the secondary category
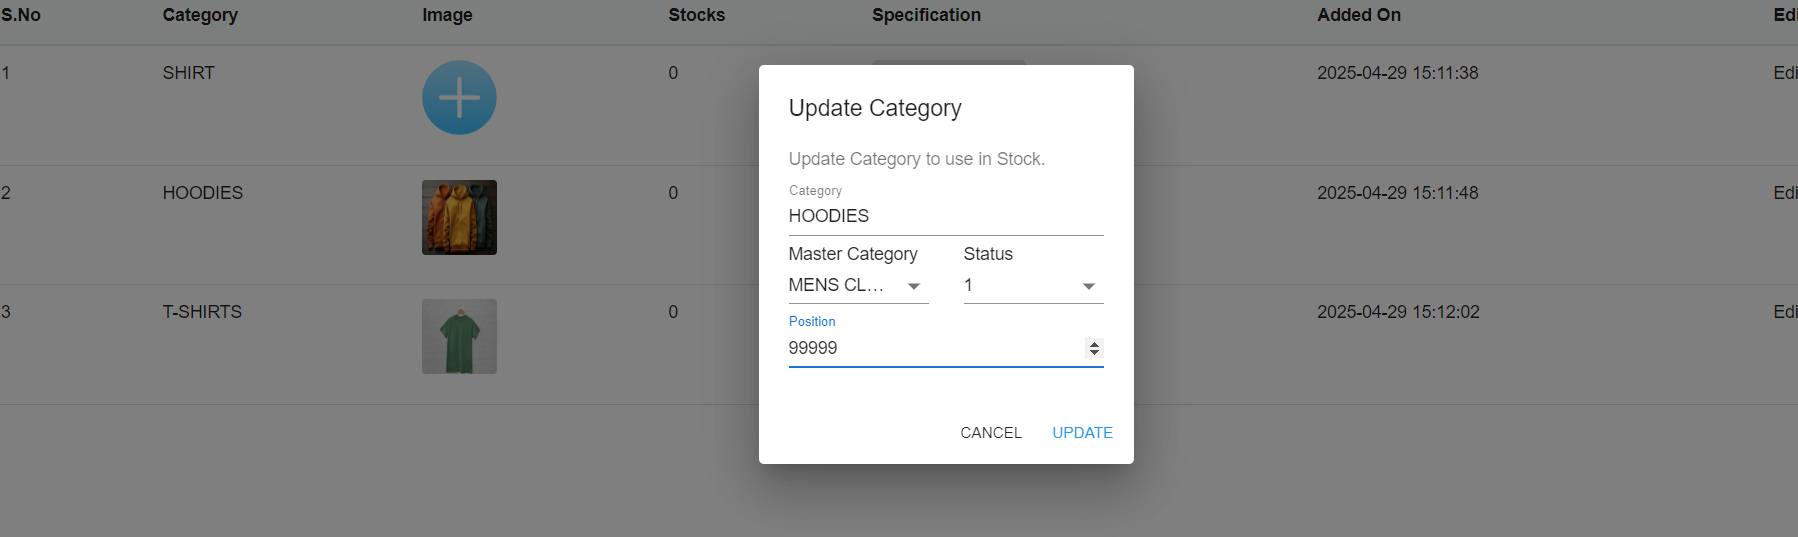
If you click on the edit button on the right side of the category, it will show the popup to edit the category, master category, status and position of the secondary category.
You can change the name and click on the save button to change the name of the category.
How to change the position of the secondary category
Click on the Edit button on the right side of the secondary category. A popup will appear where you can edit the category, master category, status, and position.
To change the display order of the secondary category, update the Position field with a numeric value. Categories with smaller values will be shown first, and those with larger values will appear later.
For example, a category with position 1 will be displayed before a category with position 2.
How to deactivate the secondary category
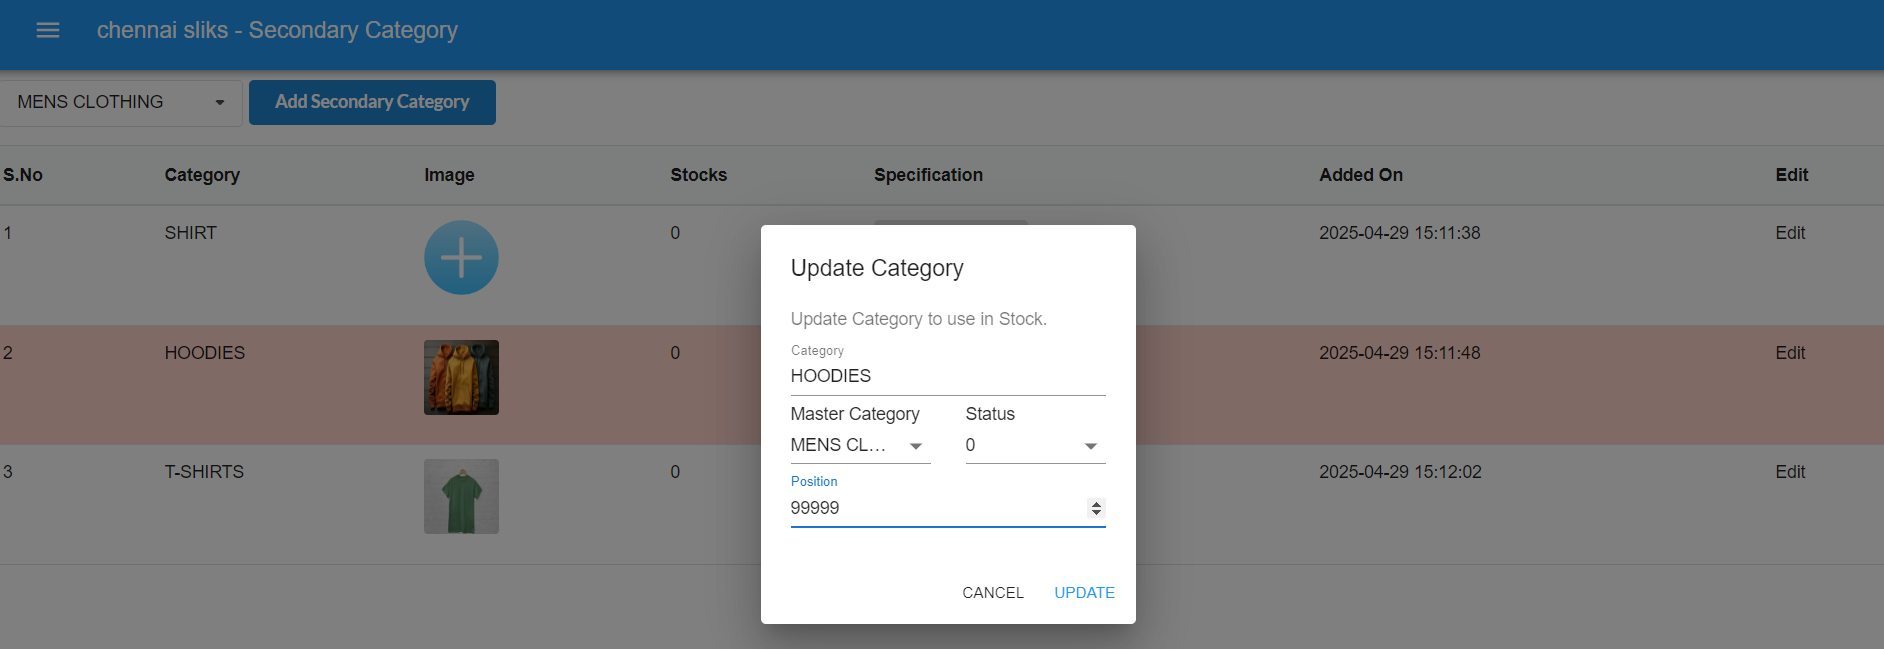

If you click on the Edit button on the right side of a category, a popup will appear allowing you to update the name, master category, status, and position of the secondary category.
You need to select the appropriate master category from the dropdown. Below the name field, there is a status dropdown located to the left of the position field. If you set the status to ‘1’, the category will be displayed on your eCommerce website. If you set it to ‘0’, the category will not be displayed.
Don’t forget to save after you make changes.